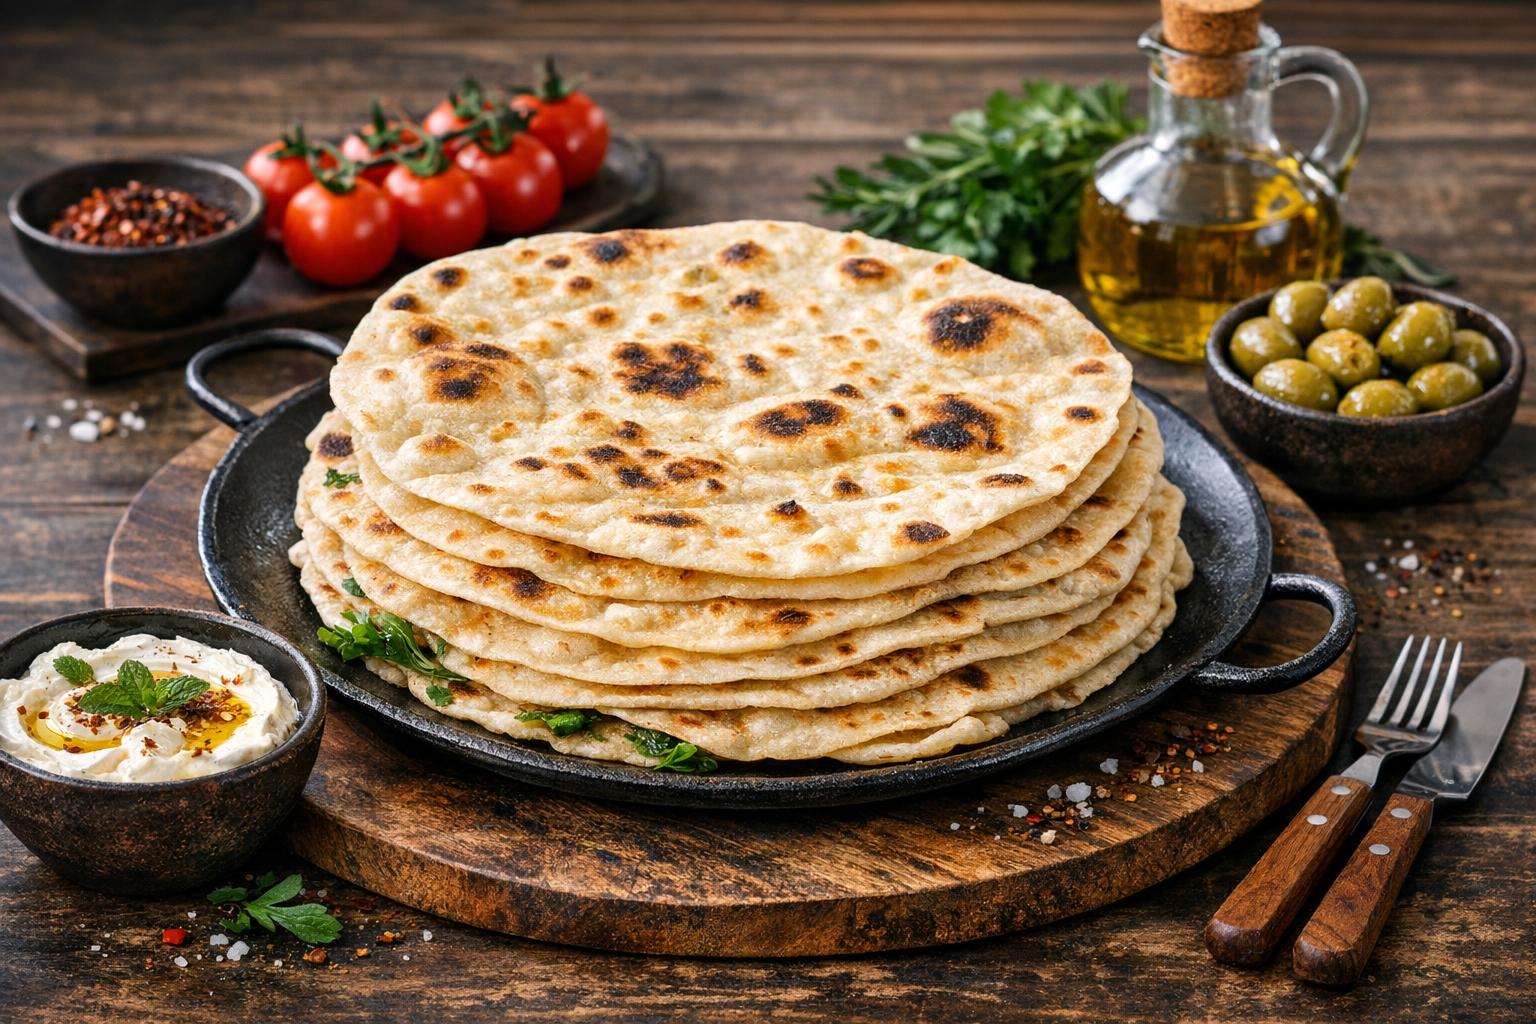
Turkish Sac Bread - Crispy Flatbread Cooked on Iron Griddle
Sac Ekmeği
Sac ekmeği is a thin, crispy flatbread with a smoky flavor from being cooked on a traditional iron griddle called a sac. The bread has golden-brown spots and a slightly charred aroma that's absolutely irresistible. This ancient cooking method creates a unique texture that's crispy on the outside yet tender inside, perfect for wrapping around grilled meats or enjoying with cheese and herbs.
Ingredients
Instructions
-
Activate the yeast
Dissolve the sugar in warm water (around 37°C). Sprinkle the yeast over the water and let it sit for 5-8 minutes until it becomes foamy and bubbly on the surface. The mixture should smell yeasty and look creamy. Do not use water that's too hot as it will kill the yeast.
-
Make the dough
In a large bowl, combine flour and salt. Add the activated yeast mixture and olive oil. Mix with a wooden spoon for 2-3 minutes until a shaggy dough forms. The dough should look rough and slightly sticky. Do not overmix at this stage.
-
Knead the dough
Turn the dough onto a floured surface and knead by hand for 8-10 minutes until smooth and elastic. The dough should spring back when poked gently. Add small amounts of flour if too sticky. Do not add too much flour as this will make the bread tough.
-
First rise
Place the dough in an oiled bowl, cover with a damp towel, and let it rise in a warm place for 60-90 minutes until doubled in size. The dough should feel light and airy when gently poked. Do not let it over-rise or the bread will be dense.
-
Divide and rest
Punch down the dough and divide into 8 equal portions. Roll each into a ball and let them rest covered for 15-20 minutes until they relax and become easier to roll. The balls should feel soft and pliable. Do not skip this resting time.
-
Roll the bread
On a floured surface, roll each ball into a very thin circle, about 2-3mm thick and 25cm in diameter. The dough should be almost translucent. Work quickly and keep unused portions covered. Do not make them too thick or they won't cook properly.
-
Heat the griddle
Heat a cast iron skillet or griddle over high heat for 3-4 minutes until smoking hot. Test by sprinkling a drop of water - it should sizzle and evaporate immediately. The surface should be evenly heated. Do not use oil on the cooking surface.
-
Cook the bread
Place one rolled dough on the hot griddle and cook for 45-60 seconds until bubbles form and the bottom has golden-brown spots. Flip and cook for another 30-45 seconds until lightly charred. The bread should puff up and smell smoky. Do not press down while cooking.
Tips
Cooking Tips
Use a cast iron skillet or griddle for the best heat retention and even cooking. The key is maintaining very high heat throughout the cooking process to achieve those characteristic bubbles and charred spots.
Alternatives
You can substitute bread flour for all-purpose flour for a chewier texture, or add a tablespoon of yogurt to the dough for extra tenderness and flavor.
Serving & Storage
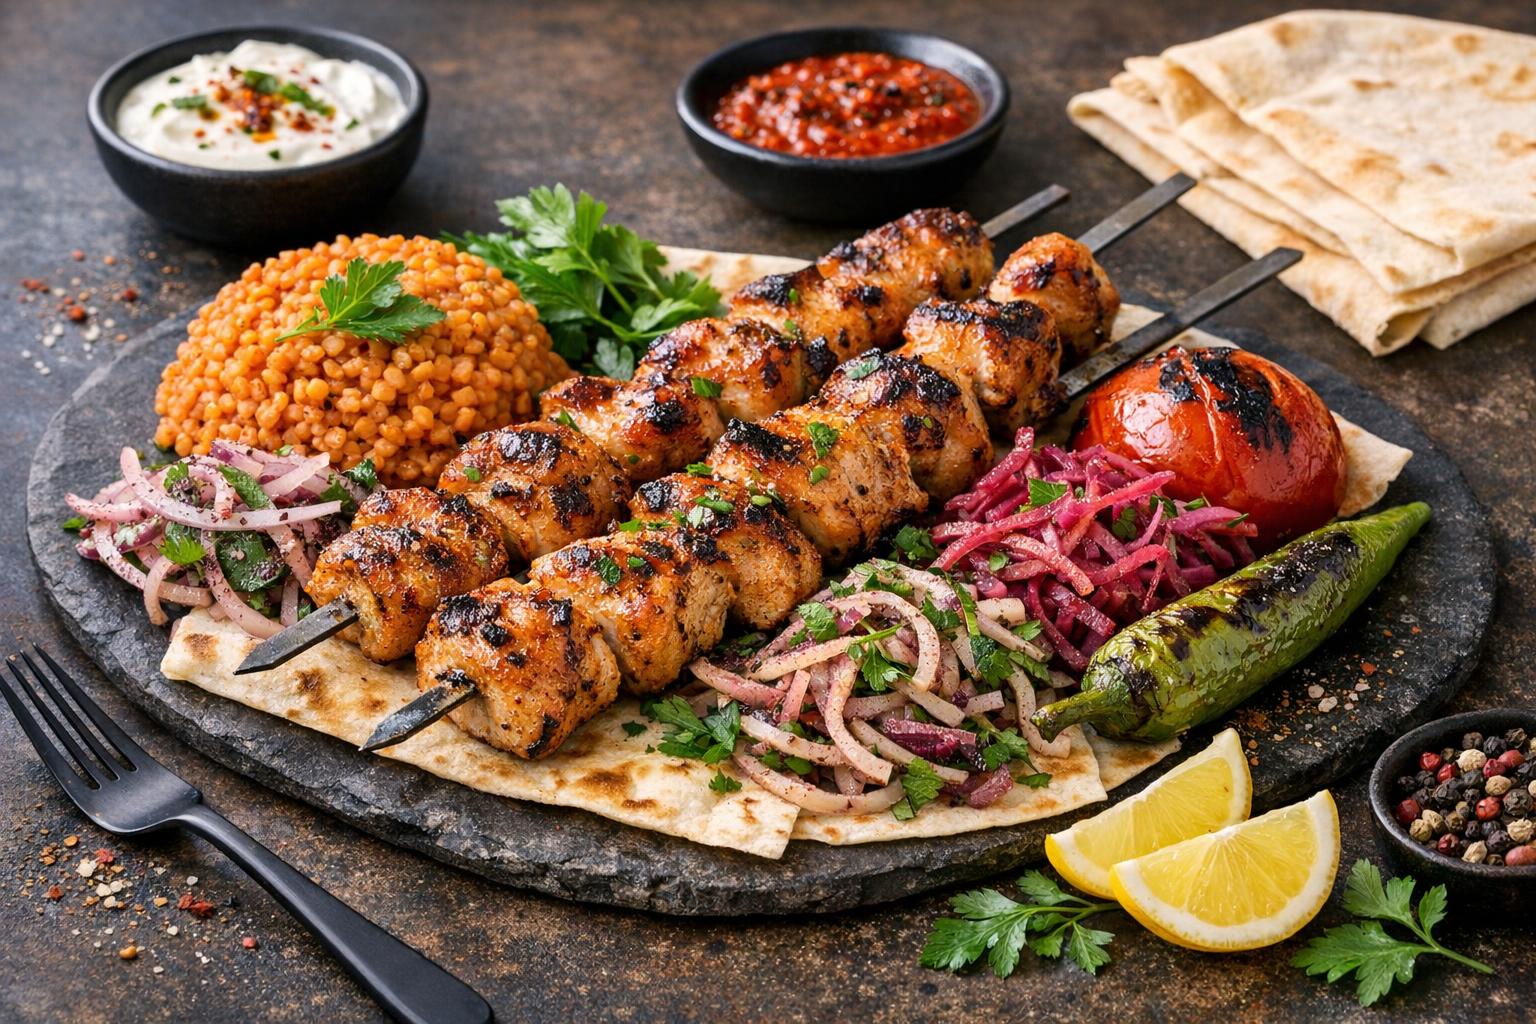
Serve immediately while warm, wrapped around grilled meats, cheese, and fresh herbs. Store leftover bread in plastic bags for up to 2 days and reheat on a dry skillet for 30 seconds per side.

Leave a Comment